Learn to Ride
Learn the basics of biking in 3 easy steps
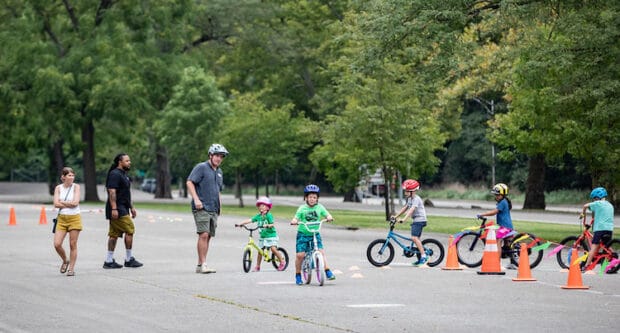
Being able to ride a bike is an essential skill that everyone deserves access to, and teaching someone how to ride can be a great activity for the whole family. Here you’ll find tips and best practices to help you teach a child or a new rider the basics of riding a bike.
If you’re teaching someone with little experience to ride a bike, it’s important to use accessible and easy to understand educational materials. Age, ability, and comfort level are factors to consider when teaching anyone how to safely ride a bike.
Take a look at our 3 step guide
- Step 1: Gear Up
- Step 2: Make sure your bike is ready
- Step 3: Practice the basics

Step 1: Gear up!
It’s important to have the proper gear to get rolling! Safety should be your number one priority. Here are a few things you will need to get started:
Helmet (Mandatory)
A helmet is one of the key components of staying safe while riding. According to PA Vehicle Code (Title 75) children under the age of 12 MUST WEAR A HELMET when operating a bicycle.
If your helmet is properly fitted, you should be able to place two fingers between the top of the eyebrow to the helmet. Then please two fingers between the straps of the ears on either side of the head. Most importantly, you should be able to fit no more than 2 fingers between your chin and the chin strap.
Watch our How-to video below for more information https://www.bikepgh.org/2018/10/25/video-properly-fit-bicycle-helmet/
Pads and Gloves (Optional)
Falling while learning to ride is almost a guarantee, so using knee and elbow pads can help lower the risk of serious injury.
Backpack or Saddle Bag (Optional)
You never know what could happen on a ride. It’s a good idea to bring a lightweight backpack or saddle bag for carrying items like snacks, first aid, water, tools or anything else you may need for your trip.
Bike (of Course!)
You want a new rider to feel as comfortable and in control of their bike as possible, and the bike they learn on can play a role in how long it takes them to learn.
Choose a bike wisely. Pick a sturdy, adjustable pedal bike that will last at least a few years for your child.
- There are many pedal bike options. Make sure you get the one that is right for your child. Consider the terrain your child will be riding on the most. Also, consider the size your child is now and how long before they outgrow the bike.
- For older children, it can be helpful to take them with you when you are looking for a bike. If possible, have them test the bike first before making the investment.
- In some cases, especially for our middle school to high school aged children, it could be helpful to get them a bike slightly larger for them to grow into. This can help save money on having to buy new bikes during their peak growing years.
- Make sure you understand the components of the new riders pedal bike. Things like brakes, seats, and handlebars, may need to be adjusted before you ride.
Want more info on different types of bikes and how to find the right one for you? Check out our guide to Finding The Right Bike!

Step 2: Make sure your bike is ready to roll
To avoid bike malfunctions and to ensure your bike is working properly, start with an ABC Quick Check! This should always be your first step before practicing or teaching someone how to ride a bike.
Need a better idea on how to do an ABC quick check? Check out our video and see for yourself!
Where to Ride
BikePGH teaches inexperienced riders bike handling skills on a paved surface and in a controlled area. An empty tennis court, basketball court, paved park path, or even an empty parking lot are good places for teaching someone to ride a bike.
For brand new riders, we recommend using parks and trails that have green spaces along the sides. Riding on grass is harder than the paved or dirt roads, but it helps create a sense of safety for new riders since the grass is a soft place to fall or bail, if needed.
If you live on or near a quiet neighborhood street, you can practice riding on the street or in an alleyway.
Here are a few local places you can practice your new skills:
- Mellon Park in East Liberty
- Westinghouse Park in Point Breeze
- Arsenal Park in Lawrenceville
- Highland Park in Highland Park
- Schenley Park in Oakland
Check out our BikePGH BikeMap to find a local park or green space near you!
Step 3: Practice the Basics
Teach the new rider with the same mindset as walking before you run. Focus on building up to actually peddling. It’s all about how comfortable and confident they are, so let them tell you when they are ready to move forward. Give your child as much time as they need to master each stage of learning to ride before moving on.
Starting
The way you start is important, especially when learning the basics. Make sure the child understands the importance of a good push off. Practicing the striding or gliding method is a great way to practice starting and stopping and can be done with or without pedals on the bike.
Stopping
Knowing how to stop is essential before any real riding happens. Make sure the learning rider understands how the braking system works. Depending on the kind of bike being used, the way to break or come to a stop may vary. Walk them through how it works and explain the importance of braking for overall control and safety.
The Brakes
Knowing how to stop is essential before any riding happens. Braking and/or stopping can feel different depending on the kind of bike you are using. Make sure the new rider understands how the braking system works.
- Strider or push bikes:
- The child bicyclist will need to use their legs and feet to slow down. The unique build of Strider bikes do not allow a rider to go faster than they can stop.
- Try going faster then slower in a straight line to help gain an understanding of slowing down.
- The new rider should focus on not dragging their feet, but placing feet flat on the ground to come to a stop.
- Handbrake bikes
- Make sure the rider understands which tire each brake affects and how to use both of them to come to a stop.
- The front brake holds 70% of your stopping power with hand brakes and the rear brake holds the remaining 30% in the back.
- Focus on using both brakes to ease into a stop and safely transition into a tripod position both in and out of the saddle.
The Glide
Take it slow! Before you start pedaling, take time to get used to how the bike moves and how to properly use the brakes.
- Practice gaining momentum and braking by using the push and glide method.
- The rider should be taking large, moonwalk-like strides while being sure to let the bike coast a little with their feet off the ground.
- Once that method is mastered, use both legs to push and lift off the ground and glide for long distances.
- Next, incorporate turns into the gliding. Practice a simple loop of two straights and two turns. This will help the new rider get used to the feeling of being in motion, turning, and coming to a stop with the brakes.
- Using a Strider or pushbike can really help master this skill. Due to the lack of pedals, the rider is forced to rely on push power to gain momentum and will not reach speeds that would seem overwhelming or dangerous.
The Pedals
Once the new rider has shown they are comfortable with braking and balancing, you can then move on to incorporating the pedals.
- This part is where the real challenge comes in. take it slow and be patient with yourself and the new rider.
- Start with small goals then build up to actually pedaling.
- You may need to support the new rider as they learn to balance the bike while pedaling. Try your best to hold them up in a way that is comfortable for both of you but does not put all the support on you. New riders will tend to lean in the direction you are holding them in and thus defeating the process.
- We recommend either holding them up by the back of the seat and the middle of the handlebars there are many ways to do this so just do what’s comfortable for you.
BONUS: Skills & Handling Drills
The best way to get a new rider comfortable with learning to ride confidently is keeping things interesting and fun! This is especially useful for those who may have a hard time staying focused. There are many drills that will help keep learning how to ride fun and engaging for everyone, here are a few we use when teaching kids to ride.
Game: Rocket Ship
This is a great drill for less experienced riders in the early stages of learning. This drill can also be modified to meet the skill level of any rider and is a fun way to learn the basics of stopping and starting using only foot power. A couple of rounds of this should leave any new rider with a sense of balance and control over their bike.
- Start slow. This exercise should not require the use of any brakes. Focus on foot power and gaining balance and control of the bike. The rider should be going slow enough to stop with their feet.
- Say “3…2…1…” while encouraging your new rider to stride fast and work up some momentum.
- When you say, “Blast Off!, have them pick up their feet and coast for as long as they are able.
- Start by doing this activity in a straight line then have them move up to coasting in a big circle.
- Up the difficulty with distance goals and incorporate brakes if the rider is comfortable.
Game: Red Light, Yellow Light, Green Light!
Knowing how to stop is essential before any riding happens. We explain how to brake properly in the first installment of this series. Please read over our instructions on braking before trying out this drill. Keep both feet flat on the ground, toes up (not down) and in pedal position by pushing their heel into the pedal towards the back wheel.
- Once stopping and starting are mastered, have everyone line up facing you from several yards away.
- When you yell “Green Light!” players are to stride or pedal toward you in a straight line.
- When you yell “Yellow Light” players can still move forward, but at a much slower pace.
- When you yell “Red Light!” they must stop.
- The goal is to be the first player to make it to you. The winner can then choose to become the caller or go again for another round.
This activity teaches new riders to propel themselves and gain momentum, how to slow down, and promotes the importance of stopping quickly. These are key skills to build on before going out on any rides as a family.

Game: Zig-Zag Course
In our youth education program Positive Spin, we use an obstacle course to tie in the balance, control, building momentum, and coming to an emergency stop all in one fun drill. Once your new riders are comfortable with pedaling and stopping with the brakes, it’s time to put it all together with a fun obstacle course. This can also be tailored to fit the skill level of the rider.

A zig-zag course focuses on building on skills in turning, braking, and balancing. If you don’t have cones, try using some objects you have at home or found in nature as a marker. Things like helmets not in use, book bags, large or highly visible rocks, and buckets are a few examples. As long as it can be clearly seen and is not dangerous you can be creative with what you use.
- Set up markers in a “zig-zag” pattern to allow for weaving in and out of markers, this lets the new riders to practice using their brakes and handlebar control.
- The rider can direct their handlebars to make fine controlled movements around the cones.
- You can repeat this exercise multiple times until they are confident enough to move on.
As the rider feels comfortable, add an extra challenge to make it a fun drill that everyone can try! Add a turn and short sprint back to the starting line coming to a full stop. The goal is to properly finish the course as fast as you can using each skill learned so far. Participants can try to beat their own times or beat each other’s time, what you do to make it more challenging is up to you!

You’ve Got This!
We hope these tips help make the experience of learning fun for everyone. Remember, people young and old learn at their own pace, so be mindful of the comfort level of those learning and work at their speed.
All activities can be adjusted to fit the skill level of the new rider and anyone else participating, just be sure to get creative and put your own twist on the activities to better meet the needs of everyone involved.
Let us know how it goes! Share your progress on social and tag @BikePGH